Thursday, December 18, 2014

Tomato Niluva Pachadi or Sun Dried Tomato Pickle

I've wanted to prepare tomato pickle for a long time but I kept on postponing it because it is a long process. It depends on the climate, we need good sunshine to dry the tomato slices. Summer season is the best time to make this pickle and even tomatoes are less juicier in the summer. I asked my pinni (aunt) for the recipe of this pickle and followed her instructions.
Let's see how I made this pickle..


What you need:

Raw tomatoes-1 kg
Chilly powder-1/2 a cup
Salt-1/2 a cup
Garlic cloves-1/2 a cup
Tamarind pulp-1/4 a cup Turmeric powder-1 tablespoon
Fenugreek seed-1 tablespoon
Mustard seeds-1 tablespoon

For seasoning:

Curry leaves-2 twigs
Red dry chilly-6
Split bengal gram or pachi sanaga pappu-1 tablespoon
Split blaqck gram or minapa pappu-1 tablespoon
Cumin seeds-1 teaspoon
Mustard seeds-1 teaspoon
Garlic cloves-5
Oil-1 cup or more 


Preparation:
  1. Wash and wipe the tomatoes with a dry cloth. Cut them into thin slices and soak them in a glass bottle or jar or tupperware container after adding one tablespoon of turmeric powder and 1/4th cup of salt.
  2. Soak them over night and the next morning, squeeze the tomato slices and dry them under the sun on a dry cloth. Wash and deseed the tamarind and add it to the tomato juice and dry it under the sun.
  3. In the evening, store the tomato slices and juice separately in your kitchen. The next day, dry them again under the hot sun.
  4. Do like wise on the third day and now the dried tomato is ready to be pickled. Transfer half of the tomato slices and the juice and tamarind, chilly powder and 1/4 a cup of salt into a mixer jar or wet grinder. Grind it into a paste.
  5. Now add the remaining dried tomato slices and garlic cloves and grind it for a few seconds in the mixer. Do not grind into a fine paste. Dry roast the fenugreek seeds and mustard seeds and allow them to cool down. 
  6. Grind them into a fine powder and mix it with the ground paste. Heat the oil in a pan and add split bengal gram, split black gram, broken dry chilly, mustard seeds, garlic cloves, cumin seeds and curry leaves one by one. 
  7. Fry them for a minute and add the ground tomato paste to it. Cook it for 1-2 minutes on a low flame. Turn off the stove and once it's cooled down, transfer it into an air tight bottle or jar.
Enjoy the sour and spicy tomato pickle with hot rice and ghee or with dosa or chapathis.

Note: Avoid using wet spoon in the pickle to give it a long life. It can stay preserved for 5-6 months, if you take good care of it. If you add less salt, the pickle may get spoilt. So enough salt should be added. Instead of seasoning the pickle at a time, you can season it little by little whenever you want.


Monday, December 01, 2014

Purple Cabbage Curry

Purple cabbage is a good source of water-soluble vitamin C. From just one cup of raw cabbage, you'll get 67 percent of the vitamin C you need daily. Your immune system needs vitamin C to function well. We can also use purple cabbage in salads and burgers.  
I posted a burger recipe using purple cabbage some time back over here:      http://dailymeals.blogspot.in/2007/09/banana-vada.html


What you need:

Purple cabbage grated-4 cups
Fresh peas-1 cup
Lime juice-2 tablespoons
Turmeric powder-a pinch
Ginger garlic paste-1 teaspoon
Chilly  powder-1/4 teaspoon
Coriander powder-1 teaspoon
Coriander leaves-a few
Salt to taste
Oil-3 tablespoons


Preparation:
  1. Wash and boil the peas and keep them aside. Heat the oil in a nonstick pan or kadai and add the grated or finely chopped cabbage.
  2. Stir it and add the lime juice to retain the purple colour of the cabbage. Now add ginger garlic paste mix it well. 
  3. Cover the pan with a lid and cook for two minutes on a low flame. Remove the lid and add the boiled peas. Mix it well and add salt, turmeric powder and chilly powder.
  4. Add 1/4 cup of water and cook for 3-4 minutes on a low flame by covering it with the lid.
  5. Add coriander powder and stir it well. Let it cook for two more minutes and add the chopped coriander leaves.
  6. Turn off the stove and transfer it into a serving bowl. Serve with steamed rice and chapathis..
Note: You can add a teaspoon of garam masala before turning of the stove. You can also add chopped onions  and green chilly.

Wednesday, November 26, 2014

Thatte Idly


Thatte Idly is a breakfast dish from Karnataka. It is also called as Plate Idly (thatte means plate in Kannada). Generally they are served along with chutney, sambar or potato or mixed veg palya {palya means curry). I had thatte idly with sambar and chutney in an occation. I liked it a lot and wanted to give it a try at home. So I bought a thatte idly stand which is also useful for making idiyappam and dhokla.
Let's see how to make them :)


What you need:

Idly rice (par boiled rice or uppudu biyyam)-4 cups
Skinned and split black gram (minapa pappu)-2 cups
Fenugreek seeds (menthulu)-1 teaspoon
Salt to taste
Ghee or oil for greasing the plates


Preparation:
  1. Soak the rice, skinned black gram and fenugreek seeds in water for 4-5 hours.
  2. Wash and grind them into a thick batter by adding salt. It took me thirty minutes to grind it in wet grinder.
  3. Allow it to ferment overnight or ten to twelve hours.
  4. Grease the plates with the ghee and fill them with the batter.
  5. Leave some space in the plates for the batter to rise while steaming.
  6. Steam them in the pressure cooker for 12 minutes without using the weight on the lid.
  7. Once the cooker has cooled down, remove the thatte idlys from the plates by using a knife.
  8. Spread some butter on the top and serve them hot with chutney or sambar. Enjoy the soft idlys..
Note: If you want, you can add half a cup of cooked rice while grinding the rice and dal for extra softness.

For the chutney, I ground skinned and roasted ground nuts and fried gram dal (putnalu) in equal quantity along with garlic, cumin seeds, coriander seeds, tamarind and salt. I seasoned it with broken dry chilly, mustard seeds, urad dal and curry leaves which were tempered in a tablespoon of oil.


Monday, November 17, 2014

Atukula Mixture or Poha Chivda

In my childhood, my mother used to make atukula mixture quite often as an evening snack and we enjoyed it a lot. It's nice to munch on them while drinking a hot cup of tea or coffee and it's raining outside.
Let's see how to make this simple and easy snack :)


What we need:

Thin atukulu or thin flattened rice-3 cups
Pallilu or veru sanaga gundlu or ground nuts-1/4 a cup
Putnalu or roasted chana dal-1/4 a cup
Curry leaves-a sprig
Chilly powder-1/4 teaspoon 
Dry red chilly-2
Cumin seeds-1 teaspoon
Turmeric powder-1/4 teaspoon 
Salt to taste
Oil-1/4 a cup


 How to prepare:

  1. Heat two tablespoons of oil in a pan and add the ground nuts. Fry them for a minute on a low flame and add the roasted chana dal, cumin seeds,  broken dry chilly and curry leaves. Fry them for a few seconds.
  2. Transfer them into a bowl and add the remaining oil to the same pan. Add the flattened rice and fry them on a medium flame.
  3. Once the flattened rice puffs up, add turmeric powder, salt and fried ground nut mixture to the pan. Stir the contents well and turn off the stove.
  4. After they cool down, store them in an air tight container.

 Note: You can also add azwine, cashew nuts and golden raisins to this mixture. And you can also deep fry the flattened rice.

Tuesday, November 11, 2014

Tomato Rice

Tomato rice is a simple, one pot meal dish which goes well with papad and onion raita. It is easy to prepare and also easy to carry as a lunch box meal for school going children or office going adults. Tomatoes contain lycopene (antioxident), vitamin A and vitamin C and are low in calories.
Let's see how to make tomato rice :)


What you need:

Rice-4 cups (I used sona masuri rice)
Tomatoes-4 big sized
Chopped onion-1 medium sized
Green chillys-5
Chopped coriander leaves-1 cup
Cumin seeds-1 teaspoon
Cinnamon stick-1
Cardamom-2
Cloves-5
Ginger garlic paste-1 teaspoon
Bay leaves-2
Turmeric powder-1/4 teaspoon
Chilly powder-1/4 teaspoon
Coriander powder-1 teaspoon
Salt to taste
Ghee-2 tablespoons
Oil-2 tablespoons


Preparation: 

1. Wash and soak the rice for ten minutes. Chop the tomatoes and green chilly into small pieces. 
2. Heat the ghee and oil in a cooker and add bay leaves, cinnamon, cardamom, cloves and cumin seeds. After a few seconds, add the chopped onions and the cut chilly and fry for two minutes on a medium flame. 
3. Now add tomato pieces and ginger garlic paste. Saute them for two minutes and add chopped coriander, turmeric powder, chilly powder, coriander powder and salt. 
4. Mix them well and add the soaked rice. Fry them for a minute and add eight cups of water. Close the lid and pressure cook it for three whistles.
5. Once the pressure go off, open the lid and mix the rice carefully without mashing it.

Serve it hot with papad and onion raita.

Note: You can also add cashew nuts and increase the quantity of turmeric powder and chilly powder (reduce the green chilly) to make it look more colourful. 

Tuesday, October 28, 2014

Sesame Bar or Sesame Chikki

Sesame chikki is very nutritious and good for health. Sesame seeds are rich in oil  and proteins. These are used in various cuisines all around the world..


What you need:

Sesame seeds-3/4 of a cup
Grated jaggery-1 cup
Sugar-1 tablespoon
Ghee-1 tablespoon
Cardamom powder- 1 teaspoon
Oil-1 teaspoon to grease the plate


      Preparation:

  1. Dry roast the sesame seeds on a low flame until they turn light brown in colour.  Allow them to cool and grease a plate with oil and keep it aside.
  2. Melt the jaggery in a non stick pan or heavy bottomed vessel. Filter it using a stainless steel net and add the sugar. Boil it again to get a thick syrup. 
  3. Check the consistency of the syrup by dropping a drop of it in a bowl of water. It should form a hard ball.
  4. Add the ghee, sesame seeds and cardamom powder to the syrup and mix it well.
  5. Turn off the stove and pour this mixture onto the greased plate. Allow it to cool for 15-20 minutes Once it has dried, break it into pieces and store them in an air tight container.
          Note: If you avoid filtering the melted jaggery, you may find sand in your chikki.

Thursday, October 23, 2014

Madata Kajalu or Tapeswaram Kajalu

Happy Diwali to all of you :)

Madata kajalu are very popular in Andhra and they are also called Tapeswaram kajalu. Tapeswaram is a village in East Godavari district of Andhra Pradesh and is famous for this sweet.
Let's see how to make them.


What you need:

For the Dough:

Maida or all purpose flour-4 cups
Baking powder or cooking soda-a pinch
Hot ghee-3 tablespoons

For dusting:
Bengal gram flour (besan)-1/4 a cup
Ghee-3 tablespoons

For the syrup:
Sugar-4 cups
Cardamom powder-1 teaspoon
Lemon juice-1 teaspoon

Oil for deep fry


      Preparation:

  1. Sieve the flour into a large bowl and add baking powder, hot ghee and mix it well. Make a soft dough (like poori dough) by adding water a little by little.
  2. Cover it with a wet cloth and leave it for half an hour. Kneed it well and divide the dough equally into four balls.
  3. Roll two balls into big circles (not too thin) using a rolling pin and on one circle, apply the ghee and sprinkle the gram flour over the surface.
  4. Cover it with another circle evenly and start rolling it upwards like a mat. You can refer to the picture. At the edge, wet with water and close firmly.
  5. Now cut the tube into one inch pieces using a knife and keep aside the two uneven edges (from the top and bottom of the tube). You will see layers from the side view of each piece.
  6. Press lightly on the top of each piece with your finger or rolling pin. Do not press them too hard, otherwise the shape will be ruined.
  7. Boil the sugar in a heavy bottomed vessel and make a syrup of one string consistency. Add the cardamom powder and lemon juice to it and turn off the stove. Cover it with a lid.
  8. Heat the oil in a pan or wok and fry 4 or 5 pieces of the dough on a low to medium flame.
  9. Once they turn golden in colour, remove them and immerse in the syrup for 1-2 minutes until they absorb it. 
  10. Transfer them onto a large plate and allow them to dry and do like-wise with the rest of the dough.
Once they dry, store in an air tight container.You won't be able to resist eating them one by one :)

Note: Avoid frying the kajalu on a high flame because they will not get cooked well on the inside. If you are making small circles, you can place three circles on each other and roll into a tube. Adding lemon juice prevents the crystallization of the sugar syrup.

Wednesday, October 22, 2014

Karapu Kajalu or Spicy Kajalu

Karapu Kajalu is an all-time favorite snack for children. These cumin flavored kajalu are very crispy and tasty. We can also make plain kajalu  and add powdered cumin seeds, chilly powder and salt to them or we can coat them with sugar syrup (one string consistency). Thus at a time we can prepare both karapu kajalu (spicy kajalu) and teepi kajalu (sweet kajalu).
Let's see how I made these karapu kajalu :)


What you need:

Maida (all purpose flour)-2 cups
Wheat flour-2 cups
Cumin seeds-2 tablespoons
Chilly powder-1 tablespoon
Turmeric powder-a pinch (optional)
Salt to taste
Hot oil-2 tablespoons for the dough
Oil for deep fry


Preparation:

1. Grind the cumin seeds, chilly powder, salt and turmeric powder into a powder in a mixer jar. 
2. Take the maida and wheat flour in a large bowl. Add the ground powder and two tablespoons of hot oil and mix it.   
3. Add water little by little and make a tough dough (like chapathi dough). Cover it with a wet cloth and keep it aside for half an hour.
4. Kneed it well and divide into four equal portions. Roll each portion into a big, thin circle using a rolling pin. Dust with dry flour if necessary.
5. Cut the circle vertically and horizontally to make small rectangles using a biscuit cutter or a knife. You can also cut them into square or diamond shapes. Now make holes on them using a fork to avoid bubbles while frying.
6. Heat the oil in a frying pan or kadai and fry the cut pieces in batches to golden brown colour on a medium  flame. Transfer them onto a paper towel and allow them to cool.  

 Once they cool down, store them in an air tight container.
     
 Note: Instead of mixing both maida and wheat flour, you can also use either maida or wheat flour.           

Monday, October 20, 2014

Motichoor Laddoo

Thinking about what to prepare for Deepavali? May be you can try this recipe. I came across this Motichoor Laddoo recipe on a TV show recently. I didn't have a perforated ladle with holes small enough to make motichoor laddoo but since this recipe involves grinding the boondi later on, it wasn't an issue. The laddoos came out very well and I felt that making these was much easier than making boondi laddoos. You can check my "Boondi Laddoo" recipe under the "sweets" label in my blog.
Let's move on to the recipe.


What you need:

Bengal gram flour or besan-1 cup
Sugar-1 cup
Milk-1/2 a cup
Turmeric powder-a pinch
Cardamom powder-1 teaspoon
Melon seeds-1 teaspoon
Ghee-for deep fry

Preparation:

1. Mix the gram flour, turmeric powder, milk and water in a wide bowl and make a batter of pouring consistency.
2. Boil the sugar with sufficient water in a pan and make a syrup of one string consistency. Add the cardamom powder and turn off the stove.
3. Heat the ghee in a wok or kadai and make boondi with the batter using the perforated ladle. No need to bother about the size and shape of the boondi because we are going to grind it shortly.
4. Add the boondi to the syrup and do repeat the process with the remaining batter. Once the boondi has soaked in the syrup and cooled down, grind it into a powder.
5. Add melon seeds and make lemon sized balls. We can make the laddoos easily without applying ghee or water to our palms unlike for boondi laddoo. Let them settle for half an hour and store them in an airtight container.

Serve the delicious laddoos to your guests during Deepavali and enjoy :)

Note: You can add dry fruits like almonds, cashews and pistachios instead of melon seeds. If you want you can add saffron food colouring to the sugar syrup to get richly coloured laddoos.

Saturday, October 18, 2014

Katte Pongali or Spicy Pongal

Katte Pongali is one of the healthy and tasty rice dishes. It is simple to prepare and is easily digestible from children to aged people. It contains carbohydrates (rice), proteins (split green gram)) and fat (ghee),  vitamins (cashew  nuts) and gives strength to us.
Let's see how to make  Katte pongali.


What you need:

Rice-1 cup
Split green gram or pesara pappu-1/4 a cup or 1/2 a cu
Green chilly-3
Finely chopped ginger-1/4 teaspoon (optional)
Curry leaves-a few
Cumin seeds-1/2 teaspoon
Pepper corns or miriyalu-1/4 teaspoon
Cashew nuts-8
Turmeric powder-a pinch
Asafoetida or inguva-a pinch
Salt to taste
Oil-1 tablespoon
Ghee-3 tablespoons

Preparation:
  1. Dry roast the split green gram and rice for two minutes on a medium flame.
  2. Allow it to cool and wash it with water. Pressure cook it with four cups of water until four whistles by adding turmeric powder, pepper corns, salt and oil.
  3. Let the cooker cool down and heat the ghee in a pan.
  4. Add cashew nuts, cumin seeds, cut green chilly, asafoetida, ginger if you are using and curry leaves one by one and fry it for a minute on a low flame. 
  5. Turn off the stove and add this to the cooked rice and dal. Mix it well and serve it hot with coconut chutney.                                                                                                                                                                                                                                                                                                     Note: You can replace green chilly with dry chilly and pepper corns with pepper powder.                    

Friday, October 17, 2014

Kobbari Pachadi or Coconut Chutney


Kobbari pachadi is one of our favorite chutneys. We prefer to have it with rice. Sometimes  I make coconut chutney for idly and dosa using green chillies.
Let's see how this chutney is made :)


What you need:

Fresh coconut cubed-1 cup
Deseeded dry red chilly-6
Cumin seeds-1 teaspoon
Coriander seeds-1 teaspoon
Bengal gram dal or chana dal-1 teaspoon
Turmeric powder-a pinch
Curry leaves- a few
Tamarind- a small berry sized
Peeled garlic cloves-a few
Salt to taste 
Oil-1 tablespoon


Preparation:
  1. Heat the oil in a nonstick pan and add dry chilli. Fry them for few seconds on a low flame and add turmeric powder,  bengal gram dal, cumin seeds and  coriander seeds one by one.
  2. Stir them for a minute and add garlic cloves, tamarind, coconut pieces and curry leaves fry for one more minute.
  3. Mix them well and turn off the stove and allow them to cool.
  4. Grind them into a paste by adding salt and sufficient water.
  5. Transfer it into a serving bowl and have it with hot rice and papad. Enjoy :)
Note: You can replace garlic with asafoetida or hing. 

Tuesday, October 14, 2014

Avise ginjala Podi or Flax Seeds Chutney Powder

I came to know about the health benefits of Flax seeds or Avise Ginjalu (Telugu) and that they contain high levels of dietary fibre, lignans, micronutrients and omega-3 fatty acids. Studies show that flax seeds lower cholesterol but excess consumption may cause some disorders like skin irritation or breathing problems.  I started searching for them in grocery shops and super markets. Unexpectedly, I found them in an organic food stall at an exhibition. I bought a small packet and decided to try making chutney powder.

Let's see how I made flax seed chutney powder..    


Ingredients:

Flax seeds-1 cup
Dry red chilly-6
Cumin seeds-1 teaspoon
Coriander seeds-1teaspoon
Tamarind-a small berry sized (optional)
Garlic cloves-4
Turmeric powder-a pinch
Salt to taste
Oil-1 teaspoon


Method:

1. Heat the oil in a pan and add broken red chilli and turmeric powder. Fry them on a low flame for a minute. Now add flax seeds, cumin seeds, coriander seeds and fry for two more minutes.
2. Add garlic cloves and tamarind pulp and turn off the stove. Once the contents get cool, add salt and grind them  into a powder in a mixer jar.
3. Leave the powder outside for 3-4 minutes and transfer into an airtight container.

Serve it with steamed rice and ghee or with idly or dosa :)


Note: You may also add hing, curry leaves, and a table spoon each of urad dal and gram dal.

Monday, October 13, 2014

Cabbage Stir Fry

Cabbage is an excellent source of vitamin Kvitamin C and fiber. Cabbage is prepared and consumed in many ways. The simplest options include eating the vegetable raw or steaming it. Cabbage has been used as a medicinal herb. Both mashed cabbage and cabbage juice have been used to remove boils and treat warts, pneumonia, appendicitis and ulcers. Excessive consumption of cabbage may cause bloating (increased intestinal gas).

Let's see how to make a simple and tasty stir fry of cabbage.


What you need:


Cabbage shredded-4 cups
Cut green chilly-3
Turmeric powder-a pinch
Hing (inguva or asafoetida)-a pinch
Fresh coconut (grated)-2 tablespoons
Mustard seeds-1/4 teaspoon
Cumin seeds-1/4 teaspoon
Gram dal-1/2 teaspoon
Curry leaves-few
Salt to taste
Oil-2 tablespoons

Preparation:
  1. Heat the oil in a nonstick pan or kadai and add mustard seeds, cumin seeds, gram dal and hing. Once they splutter, add curry leaves, green chilly and turmeric powder.
  2. Now add the shredded cabbage and stir it for two minutes. Add salt and cover it with a lid.
  3. Cook it for 4-5 minutes stirring in between on a medium flame. Remove the lid and keep stirring for two minutes on a low flame. 
  4. Add grated coconut and fry it for two more minutes.
  5. Turn off the stove and transfer it into a serving bowl. Serve it with steamed rice and dal.
Note: Hing and fresh coconut powder give a nice flavor and taste to this dish. So I have avoided adding ginger garlic paste to it.


Sunday, October 12, 2014

Home Made Garam Masala

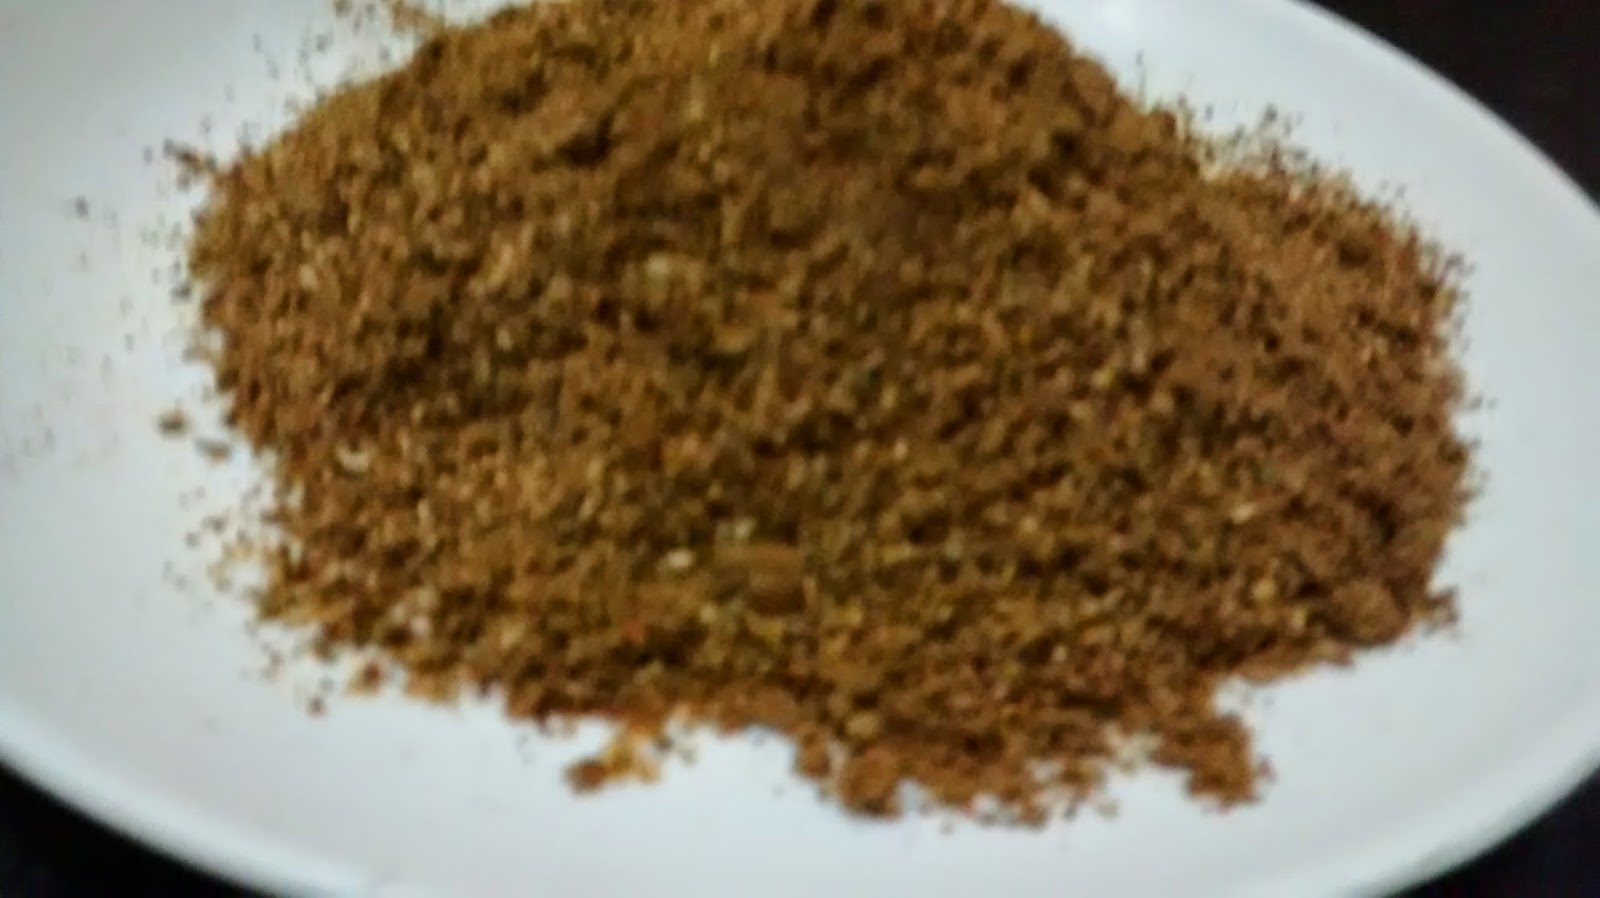
Garam Masala has special importance in Indian cuisine. Adding garam masala is a finishing touch to many vegetarian and non-vegetarian dishes.This powder of mixed spices not only increases the taste, but also gives a nice flavor to the dish. I added a few extra spices to the garam masala made by my mother. Let's move on to the recipe of  Garammasala.


What you need:
Coriander seeds-1 cup
Cloves-1 teaspoon
Cardamom-5
Cinnamon sticks-2
Peeled garlic cloves-5 (optional)

Additional:
Sajeera-1 teaspoon
Nutmeg-1
Mace-4
Bay Leaves-2

Preparation:
  1. Dry roast the coriander seeds in a pan on a medium flame for 2-3 minutes or until they become light brown.
  2. Lower the flame and add cloves, cardamom, cinnamon, sajeera, nutmeg, mace and bay leaves. Fry them for 1-2 minutes.
  3. Turn off the stove and add the garlic cloves. There is no need to fry the garlic cloves. They absorb heat from the remaining spices in the pan.
  4.  Allow the spices to cool and grind them into a powder. After 3-4, minutes transfer the powder into an airtight container.                                                                                                                                                                                                                                                                            Note: You can also add star anise and black pepper corns.

Thursday, October 09, 2014

Cauliflower Stir Fry

Cauliflower can be roasted, boiled, fried, steamed or eaten raw.  Cauliflower is low in fat, low in carbohydrates but high in dietary fiber, folate and vitamin C.
Let's see how to make cauliflower stir fry.


What you need:

Cauliflower florets-2 cups
Chilly powder-1 teaspoon
Turmeric powder-a pinch
Coriander powder-1 teaspoon
Ginger garlic paste-1 teaspoon
Salt to taste
Oil-2 tablespoons


Preparation:
  1. Clean and place the cauliflower florets in hot salted water for 2-3 minutes. Drain the hot water and wash again with cold water.
  2. Heat the oil in a non stick pan or kadai and add the cauliflower florets. Add turmeric powder and ginger garlic paste and mix it well.
  3. Add salt and cook it for 4-5 minutes on a medium flame by covering with a lid and stirring in between.
  4. Remove the lid and add chilly powder and coriander powder. Mix it well and stir for 3-4 minutes on a low flame.
  5. Turn off the stove and transfer it into a serving bowl. Serve it with steamed rice and rasam.
Note: You can also add garam masala before turning off the stove.

Saturday, October 04, 2014

Godhuma Pindi Halwa or Wheet Flour Halwa

Happy Dasara!
Godhuma Pindi Halwa is a simple and healthy recipe.It can be prepared during festivals as prasad or nivedyam. If we have sudden guests at home or we feel like having something sweet, we can make this halwa easily. This recipe doesn't require many ingredients either.


What you need:

Wheet flour-1 cup
Sugar-3/4 cup
Ghee-1/4 cup
Water-2 cups
Almonds-few
Raisins or dry grapes-few


Preparation:

1. Heat the ghee in a pan and fry almonds and raisins for a minute on a medium to low flame. Transfer them       into a bowl.
2. Now add the wheat flour and fry till it turns brown in colour and gives a nice aroma.
3. Lower the flame and add sugar and water to it and stir continuously without forming lumps.
4. Once the halwa thickens add the fried almonds and raisins. Add one tablespoosn of ghee and mix it well.
5. Transfer it onto a greased plate and cut into desired shapes. Children will enjoy the halwa in fun shapes :)

Note: You can add the dry fruits of your own choice like cashews and
pistachios.

Monday, September 29, 2014

Rajma Guggillu or Red Kidney Bean Sundal

Rajma are rich in protiens and soluble fiber content and help to improve immunity system. Let's see how to make this healthy snack.. 


What you need:

Rajma or red kidney beans--1 cup
Water-4 cups
Mustard seeds-1/4 tsn
Cumin seeds-1/4 tsn
Urad dal-1 teaspoon
Hing-a pinch
Green chilli-1
Curry leaves-few
Salt-to taste
Oil-1 tablespoon
                                                                  

Preparation:
  1. Wash and soak the rajma in sufficient water for ten hours or over night. 
  2. Add four cups of water and salt and pressure cook rajma upto four whistles.
  3. After fifteen minutes open the lid and drain the water. 
  4. Heat the oil in a pan and add mustard seeds, cumin seeds, urad dal, cut green chilli, hing, and curry leaves and let them splutter for few seconds.. 
  5. Add the cooked rajma and salt if required and saute for two minutes and turn off the stove. Transfer them into a serving bowl.          
Note: You can replace green chilli  with chilli powder. If you want you can also add two tablespoons of fresh grated coconut in the end..

Sunday, September 28, 2014

Sunnundalu or Uraddal Laddoo


Sunnundalu is a popular and traditional dish of Andhra. Sunnundalu are nothing but laddoos made by mixing roasted and powdered urad dal, jaggery powder and ghee. These laddoos are simple to make and are very good for children as they contain protiens (in urad dal), iron (in jaggery) and fat (in ghee). Let's see how to make them...                                                        


What you need:

Skinless uraddal (skinless black gram)-2 cups
Powdered jaggery-1 and 1/4 a cup
Ghee-1/2 a cup 


How to make:

1.Dry roast the urad dal on a medium flame for five minutes by stirring in medium intervals. Lower the flame and fry for 3-4 minutes until it gives a nice aroma.
2. Once the dal gets light brown colour, turn off the stove. Allow it to cool and grind into a fine powder.
3. Transfer the flour into a wide bowl and add the hot ghee and powdered jaggery. Mix it well and make lemon sized balls.
4. Leave them for 10-15 minutes to settle down and store them in a dry container.
  Delicious and healthy sunnundalu are ready to eat now :)

Note: We can replace jaggery with sugar. Avoid roasting the dal on a high flame, the laddoos may give burnt smell and at the same time improper roasting of the dal gives stickiness to laddoos.


Saturday, September 27, 2014

Ragi Murukulu or Ragi Janthikalu

Ragi or Finger Millet is the one of the most nutritious food and is rich in calcium, protein, iron and also minerals. It is an excellent baby food and considered as veg weightloss diet. It helps in increasing hemoglobin level in anemic people. In most recipes ragi is used in powder form. The state of Karnataka is the largest producer of ragi in India. It's good to incorporate ragi in the diets in one way or the other. we can make ragi porridge, ragi mudda, ragi rotti, ragi idiyappam, ragi laddoo, ragi murukulu..
I am going  to share the recipe of Ragi Murukulu with you :)


What you need:
Ragi flour-1 cup
Rice flour-2 cups
Butter-2 tablespoons,
Azwine-1 teaspoon,
Chilli powder-1 teaspoon,
Turmeric powder-a pinch (optional)
 Salt to taste,
Oil for deep fry

Preparation:
1. Mix all the above ingredients except oil in a wide bowl. Make a soft dough using sufficient water.
2.  Heat the oil in a kadai or wok on medium flame. Greese the murukulu mould with oil and fill it with the dough.
3. Press the dough in circular motion carefully in the oil. Fry it until it turns brown in colour. 
4. Flip it to the other side and fry it till it gets brown colour. Transfer it onto a paper towel and do the same with the remaining dough. 
5. Once the murukulu get cool, transfer them into an air tight container.

Note: You can also replace azwine with cumin seeds.

Sunday, September 14, 2014

Atukula Upma or Methi Poha

Whenever I am  in a hurry to go out or want to have a light meal, I make this simple dish. Atukula Upma with fresh or dry menthi kura (fenugreek leaves). We can have it for breakfast or as a snack.


What you need:
Atukulu or flattened rice or rice flakes (thick)-2 cups
Fresh fenugreek leaves-1/2 a cup or 1 tablespoon dry methi
peanuts-1 tablespoon
Urad dal-1/2 teaspoon
Gram dal-1/2 teaspoon
Chopped green chilli-1
Mustard seeds-1/4 tsn
Cumin seeds-1/4 tsn
Turmeric powder-a pinch
Hing-a pinch (optional)
Dry chilli-2 broken
Salt-to taste
Oil-2 tablespoons


Preparation:
  1. Wash the rice flakes with water, drain the water and keep them aside.
  2. Heat the oil in a wok or pan and add the crushed dry chilli, peanuts, urad dal, gram dal, mustard seeds, cumin seeds and hing. Fry them for a minute on a low flame.
  3. Now add the green chilli, fenugreek leaves and turmeric powder. Fry it for 1-2 minutes and add the rice flakes.
  4. Add salt and mix it well. Fry it for two more minutes and turn off the stove.
     Transfer it onto a serving plate and serve it with curd. :)

Note: You can replace the peanuts with sesame seeds or cashew nuts. 


Wednesday, September 10, 2014

Green Apple Jam

An apple a day keeps the doctor away :) I bought green apples from the supermarket because I was attracted by their color. Sometimes green apples taste a bit sour and are inedible. I thought of making a jam with those apples.
I have previously posted my recipe for oven-made peach jam: http://dailymeals.blogspot.in/2007/10/peach-jam-biscuits.htm
Today is the seven year Anniversary of my blog :)
Now let me show you how I made the green apple jam :)


What you need:
Peeled and cubed green apples-2 cups
Sugar-1 1/2 cup
Lemon juice- 1 tablespoon
water- 1/4 cup
Cinnamon stick-1/2 an inch (optional)


Preparation:
  1. Place the apple cubes in a microwave safe bowl and add 1/4 a cup of water.. Cook them in the oven for three minutes and then switch it off. Mix it well and add sugar to it. Cook the contents for three more minutes.
  2. Now switch it off, mix it and give a two-minute break. Cook it again for three minutes in the oven and give another break. Mix it and add the cinnamon stick.
  3. Cook again for three minutes. It took me 15-16 minutes to thicken the jam.
  4. Take the bowl out and let it cool. Take out the cinnamon stick and add the lemon juice. Mix the jam properly and store it in a glass jar. 
  5. Refrigerate the jam and use whenever you need it. Serve it to children with bread, chapathi or even dosa. Enjoy the homemade, healthy and yummy Green Apple Jam :)

Note: You can add one tablespoon of ghee or oil to prevent the jam from sticking to the bowl while cooking. And you can also blend the apple cubes and then cook the pulp with sugar. 

Sunday, September 07, 2014

Idiyappam (authentic Kerala dish)


Happy Onam to all those who are celebrating it :)
Idiyappam is an authentic Kerala dish. We visited Kerala in December (2013). During the trip, I realized why Kerala is called "God's Own Country". It's a very beautiful place. It's filled with greenery, coconut trees and the aroma of spices. I came to know the meaning of 'Kerala' is coconut through a cab driver. Coconut has an important role in their cuisine. We had appam with stew and puttu with chick pea curry which tasted amazing. I was also very excited to see the mangrove forests.


                                                  Mangrove forest..

I tasted idiyappam with grated coconut and sugar. I gave this dish a try and wanted to share my recipe with you. The Idiyapams were delicious with coconut milk.


Ingredients:

Idiyappam flour-2 cups
Warer-2 and 1/2 a cup
Ghee or oil-2 tablespoons
Salt to taste


Method:

1. Heat the water in a vessel with salt and one tablespoon of ghee until you see bubbles. Turn off the stove and put the flour in a bowl.
2. Mix the flour with hot water until it turns into a soft dough. Now grease the steaming plates and murukku press with ghee.
3. Fill the bottom of the press with dough and press it onto the steaming plates using the top part of the press. Do this in a circular motion (similar to pressing murukku).
4. Steam them in an idliy maker for 10-12 minutes. Turn off the stove and open the lid after 2-3 minutes. Serve the steamed Idiyappams separately on a big plate.
Note: If you want, you can use fresh rice flour by soaking raw rice for  two hours and grinding it into a fine powder (after drying the rice for half an hour under a fan on a cloth). Sieve and dry roast the powder for two minutes on a low flame.

Coconut Milk with Sugar

Ingredients:

Fresh grated coconut-2 cups
Sugar-1 cup (as per your taste)
Water-2 cups
Cardamom powder-a pinch
Rice flour and coconut paste (mix 1 tablespoon of rice flour and 1 tablespoon of coconut extract with 2 tablespoons of water)
Ghee-1/2 tsn


Method            

1. Grind the grated coconut with a cup of water and filter the thick coconut milk into a bowl. Keep it separately and add one more cup of water to the extract and grind it again. 
2. Filter the thin coconut milk into a bowl and heat it in a thick bottomed vessel on a low flame for a minute. Now add the rice flour, coconut paste and sugar to it and stir well.
3. Add the ghee and heat for a minute. Now add the thick coconut milk and cardamom powder. Heat for a minute and turn off the stove.
4. Transfer the sweetened coconut milk into a container and serve it with the idiyappam.
Pour the coconut milk on the Idiyappam and have it :) Simply delicious...

Note: It's important that the whole process of preparing coconut milk should be done on a low flame otherwise it will curdle. And you can also serve Idiyappam with vegetable stew or sambar or any others of your choice.